![]()
![]()
![]()
![]()
|
|
|
|
|
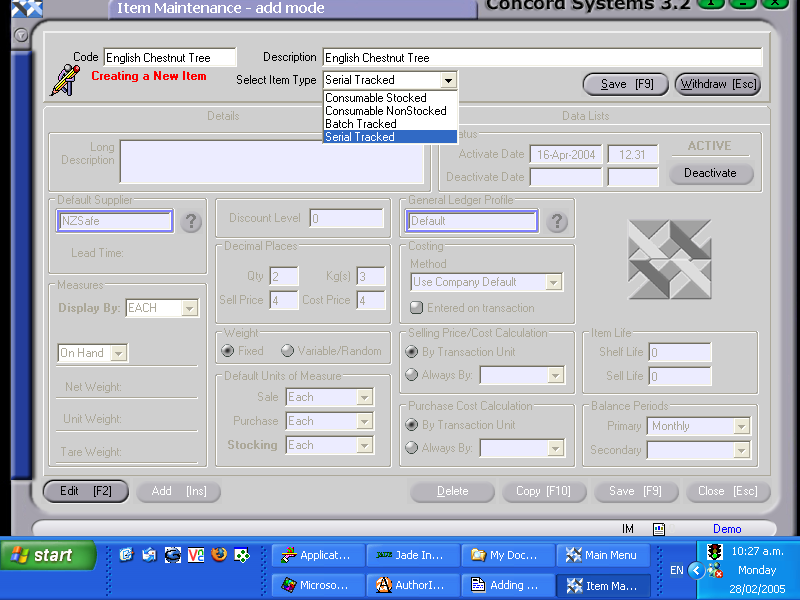
The procedure for adding a new stock item is as follows:
The screen IMQ Maint (Item Quantity Maintenance) will automatically appear.
6. Add [INS]
The two boxes which are required to be completed are:
- More than one Unit of Measure may be chosen.
An example below is where the number of items in a Pallet are compared against 1 each.
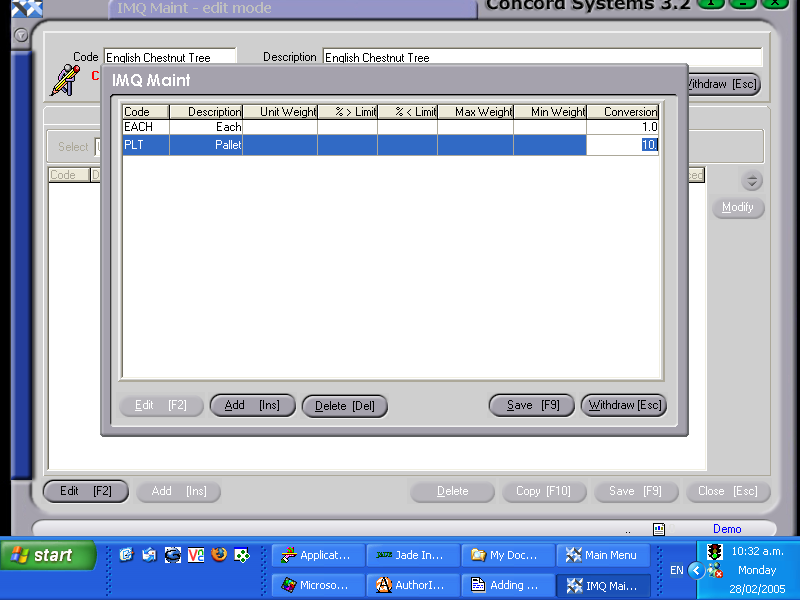
7. Save [F9]
8. Click on the Details header to return to Item Maintenance.
9. Complete the section "Default Units of Measure".
For each of the three categories Sale, Purchase and Stocking, click on the down arrow to highlight and select the appropriate Unit of Measure (UOM) as entered in the previous screen. If this section is not completed, the Item will remain INVALID and will be unable to be used in processing.
The following are other sections which may be completed.
Long Description
Default Supplier – The supplier that the item is usually purchased from. Either enter this directly in, or click on the ? button and select [F3] from the supplier list.
Measures – Choose the UOM that the item is to be displayed by, and what quantity required to be displayed.
Discount Level – Enter as appropriate (Refer to the chapter on Discount Matrix Maintenance <DM> to see the effect of a Discount Level).
Decimal Places – These are the decimal places for display purposes.
General Ledger Profile – Defaults to the Default Company Profile as previously set up under the Organisation Maintenance <OM> function.
Costing Method – Click on the down arrow button for selection. The Company Default setting is as previously set up under the Organisation Maintenance <OM> function.
Selling Price and Purchase Price cost calculation – is usually set to “By Transaction Unit”, but can also be altered to another method by clicking on “always by” and selecting appropriately.
Item Life – Enter the Shelf Life and Sell Life as expressed in months, if applicable.
Balance Periods – This is generally expressed as monthly, but can be set to other options.
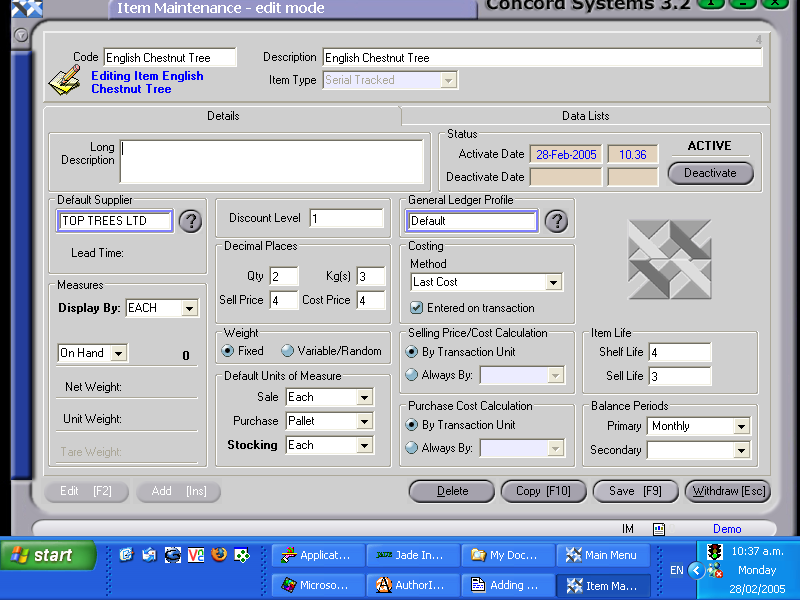
Once all the Header details have been completed, the Item should be activated, by clicking on the Activate button in the top right hand of the screen.
10. Save [F9].
An example of a completed Item Maintenance screen is demonstrated below.