The procedure for entering an Item Receipt is as follows:
Add [INS].
Create a Receipt Reference. Enter the reference details of the receipt.
Save [F9].
Date. To change the day, use the [up/down arrow keys]. To change the month, use the [up/down arrow keys + shift key].
Location. Ensure the location that the stock is being receipted into, is correct. To change if required, click on the down arrow and click to highlight.
Add Line [INS].
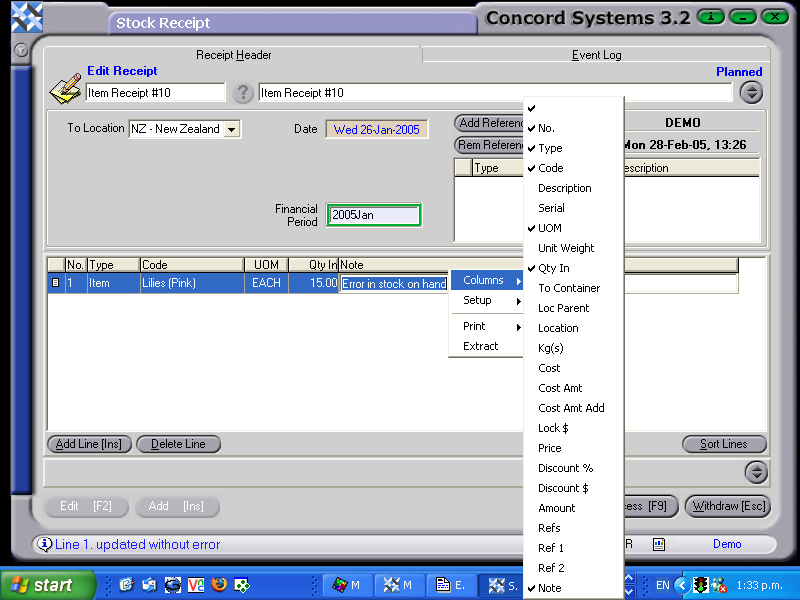
Enter the details of the receipt. (These instructions are for the minimum amount of information required. If further information is required to be entered, right click on the table headings, select columns, then click on the appropriate heading to either add to or delete from the table headings).
Type. Use the down arrow key to select "Item"
Code. Enter the name of the stock item, or use the [up/down arrow keys + shift key] to select.
Unit of Measure. This column should be kept turned on, but once the item has been selected, the unit of measure for that item will automatically appear.
Qty In. Enter the number of items to be receipted in. (Based on the unit of measure for that item).
Note. Enter if required.
8. Process [F9] and select one of the following options:
Process and Complete immediately - The receipt will be unable to be edited or deleted and the following journal will be automatically completed.
Debit Stock on Hand
Credit Closing Stock
Process but do not Complete immediately - The receipt will be able to be edited by a new Version being created. No journal will be completed.
Hold - The receipt will be held in a 'Planned' state and is able to be edited.