Select the Suppler. Either type in the name, or click on the ? button to bring up the Supplier List. Click on the relevant supplier to highlight, then Select [F3]
Add [INS]
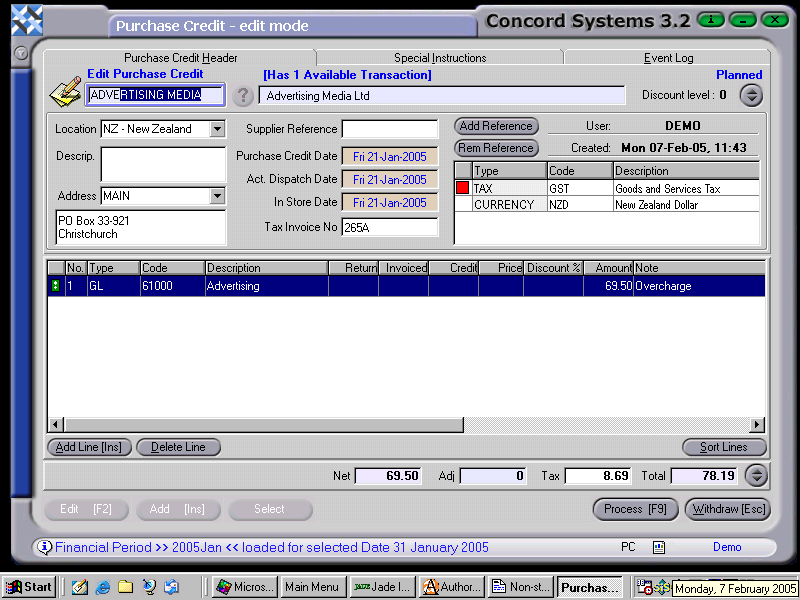
Location – Ensure that the location is correctly selected, by clicking on the down arrow button to select.
Description – Enter if required.
Address – If different to the default address, click on the down arrow and select to change as required.
Supplier Reference – Enter if required.
Purchase Credit Date – Will default to actual date, use the [up/down arrow keys] to change the day, or the [up/down arrow keys + shift key] to change the month.
Act. Dispatch Date and In Store Date – as above.
Tax Invoice No. – Must be entered.
Reference Table – Ensure that the references for Currency and Tax are entered.
(If there is no data available, for either, the relevant details must be entered through the Supplier Maintenance <SM> screen – Data Lists).
Then proceed as below:
Add Line [INS]
Type - Ensure this is set to GL (General Ledger), by clicking on the down arrow in the Type box and selecting.
Code – This is the General Ledger account code. Either type it in, or use the [up/down arrows + shift key] on the keyboard to select.
Amount – Type in the GST exclusive amount.
Once details have been entered correctly, Process, using the following options
Process by completing immediately. The invoice will be completed and cannot be edited. The automatic journal will be completed, ommitting any reference to stock.
Debit Accounts Payable
Credit GST
Credit Expense A/c (Advertising)
Hold and do not complete immediately. No journals will be completed and the invoice is able to be edited.