Previous Topic

Next Topic

Book Contents

Book Index

Entering a Purchase Cost Adjustment

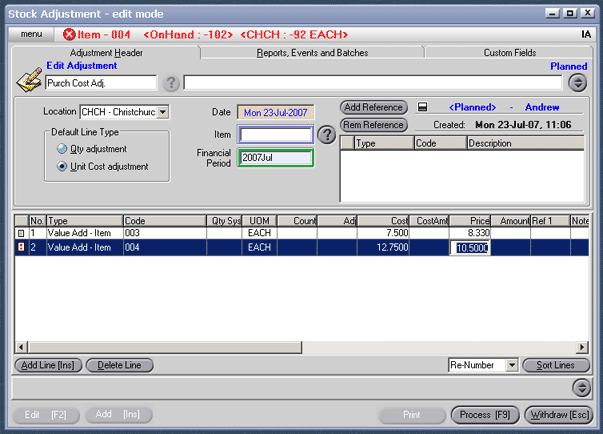
The procedure for entering an Item Adjustment, is as follows:

  1. Create a new Item Adjustment Header (see Create a Header) - or edit an existing one (see Edit a Header).
  2. Key in a reference number and / or description.
  3. Save the Header [F9].
  4. The transaction date will default to today - to change the day, use the [up/down arrow keys]. To change the month, use the [up/down arrow keys + shift key].
  5. Ensure the location of the item to be adjusted is correct. If not, click on the down arrow and click to highlight the correct location.
  6. The transaction header will default to a Default Line Type of 'Qty adjustment' - change this to Unit Cost adjustment.

    This simply sets the line type of each new line created - line Type can be changed on a line-by-line basis, allowing both price and qty adjustments lines on the same Header.

  7. Add Lines (see Add a Transaction Line).
  8. Enter the details of the adjustment. (These instructions are for the minimum amount of information required.

    Type - Use the down arrow key to select "Value Add - Item" if necessary.

    Code - Enter the name of the stock item, or alternatively use the [up/down arrow keys + shift key], or press [F3] to view Item List and select the Item.

    Note that the current purchase price is shown in the 'Cost' field.

    Price - Enter in the actual cost of the item.

    Note - Enter any line notes as required.

    CS Screenshot - linked

  9. If further information is required to be entered, right click on the table headings, select columns, then click on the appropriate column heading to either add to or delete from your table headings).
  10. Process [F9], and select Process, Hold or Delete (see Transaction Processing Options).

See Also

Item Adjustment <IA>

Entering a Stock Adjustment

Editing a Planned Item Adjustment